Summary
This article covers how to create, customize, and download existing email templates.
Table of Contents
- Access Template Management
- Create and Customize Templates
- Add Template to Workgroup
- Download and Update Existing Templates
- Support Emails in Multiple Languages
- Delete Templates
When the scheduler has finished a job execution, it can send out notification emails to designated recipients. These emails depend on user defined email templates.
Email templates are managed at a workgroup level and assigned for use with a job’s recipients. Any templates added for a workgroup can be used for jobs existing at that workgroup level or at a child level of that workgroup. Localized versions of an email template can also be added. Only Job Schedulers can manage email templates. Job Admins can only view email templates through the Scheduler interface.
Note: Email templates have a permission type of “public” in File Manager and can be viewed through File Manager regardless of a user’s scheduler permissions. Therefore, care should be taken to not include protected information within the templates.
This page describes the processes for creating and customizing email templates using a text editor, adding and downloading templates through the scheduler interface and updating existing templates. This page also describes how to manage email templates for different languages. If you need to delete an existing template, you will need to contact the Fountayn University.
Access Template Management
The Manage Templates Screen can be accessed through the Scheduler Main Screen or while managing recipient settings for a job.
Access Templates Through Scheduler Main Screen
- On the Scheduler Main Screen, hover the mouse over the green Actions Menu and select ‘Manage Templates’.

- If you are the Job Scheduler for multiple workgroups, select the workgroup for which you would like to manage templates.

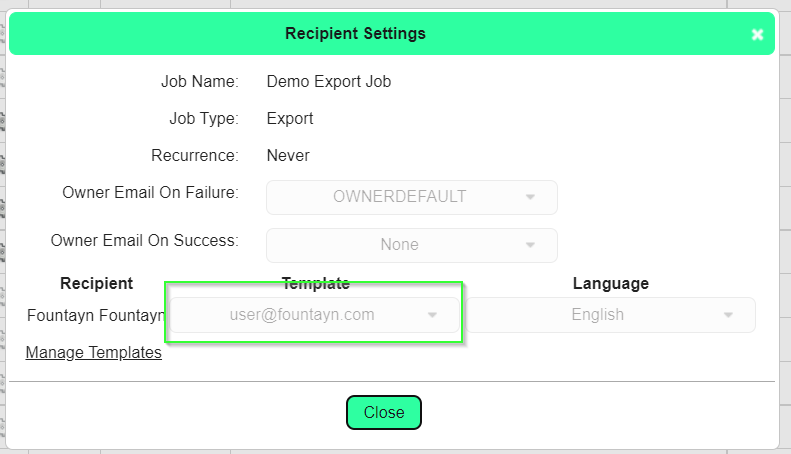
Access Templates While Setting Recipients
- When editing the Recipient Settings for a job, click the ‘Manage Templates’ link.

You will be directed straight to the Manage Templates Screen for the workgroup that the job belongs to.
Create and Customize Templates
Email templates are files with the file extension vm. To create email templates for use with the scheduler, you can either start from scratch or work off a default template. Either way you will need a text editor such as Notepad, Nano or Emacs in order to edit templates. This section describes the process for creating a template using an empty base template. For additional examples, view the default templates.
Define Email Subject and From Address
After downloading the base template and opening it using a text editor, start by defining the email subject and ‘from’ address. These elements are specified through a special syntax using key words and brackets. Job-related data can be incorporated into the email subject and ‘from’ address through the use of context keys.
- On the first line of the file above the <html> tag, enter the following to specify the subject where X is the intended email subject: {{subject: X}}
If no subject is specified, the value “Fountayn Scheduler Notification” is used. - 2. On the second line of the file, specify the From Address where X is the email address: {{from: X}}
If no From Address is specified, the default value “no-reply@fountayn.net” is used.
The following example shows the expected output for a job named “pmsDemo2 – Form Statistics.”

After performing these steps, the resulting template file could look like this.
Define Email Body
The rest of the email content depends on the details that you want to share with recipients. Job-related data can be incorporated into the template through the use of context keys. The email templates also use html coding for formatting. For additional information on using html coding in email templates, view the help page on editing templates.
This section describes how to create a simple email template using a few of the context keys listed below and works off the base template from the previous section. Note the use of the <br> tag to create line breaks.
1. After the final closing </table> tag and <br> tags, enter a greeting followed by the $recipient context key.
Example:
Dear $recipient, <br><br>
2. Enter general details about the job based on the available context keys.
Example:
$jobType Job $jobName terminated at $dateTimeCompletion. <br>
Workgroup: $workgroup <br>
Recurrence: $recurrence <br><br>
3. If the recipients should have access to the job package, enter a message regarding the job package followed by the $downloadLink context key.
Example:
The results of the job can be downloaded here and are available for 30 days: $downloadLink <br><br>
4. Using a ‘foreach’ loop and ‘if’ statement, enter text to specify the completion status of each task in the job.
Example:
Task Summary:<br>
#foreach ($task in $tasks)
    Task $task.name: #if ($task.passed) Passed #else Failed #end <br>
#end
The template configured in steps 1-4 will result in an email like the following and a template file like this.

5. Once all context keys and information have been added, save the template file with your text editor and add the template to the workgroup.
Available Context Keys
The following is a complete list of context keys that can be used within email templates.
- $recipient – If recipient is an internal user, recipient’s first and last name; otherwise, the recipient’s email address is used
- $jobType – The job type which can be either Export, Import, Report or Custom
- $jobName – Name of the job as specified during job creation
- $dateCompletion – Date on which the job completed
- $timeCompletion – Time at which the job completed
- $dateTimeCompletion – Date and time at which the job completed
- $workgroup – Name of the workgroup that owns the job
- $recurrence – The job’s recurrence type which can be either: Never, Daily, Weekly or Monthly
- $jobOwner – First and last name of the job owner
- $downloadLink – A link to the job package; recipients designated as external users will be required to log in prior to downloading the package
Take care when using the following context keys in ways that differ from the standard setup in the default email templates. These keys will return unexpected results if not contained within 'if' statements and 'foreach' loops. - $tasks – The set of all the tasks in the job; must be used within a ‘foreach’ loop in conjunction with the $task context key in order to display correctly
Note: $task is used as an example here and in the following items. You can use another iterator name in the foreach loop if desired.
- $task – A temporary variable used to iterate through the items in $tasks, $tasksFailed or $tasksPassed; must be accessed through a ‘foreach’ loop in conjunction with a context key representing a set of data
- $task.name – Name of the task
- $task.passed – Boolean indication of whether or not the task was successfully executed
- $task.resultCode – The result code associated with the task; this can be helpful to gain additional information regarding a task that fails to complete
- $hasFailedTasks – Boolean indication of whether or not the job has any tasks that didn’t successfully execute
- $hasPassedTasks – Boolean indication of whether or not the job has any tasks that successfully executed
- $tasksFailed – The set of all the tasks that failed in the job; must be used within a ‘foreach’ loop in conjunction with the $task context key
- $tasksPassed – The set of all tasks that succeeded in the job; must be used within a ‘foreach’ loop in conjunction with the $task context key
- $ownerLog – The set of all log messages related to IOExceptions or missing email templates if any exist; must be used within a ‘foreach’ loop in conjunction with the $log context key
Note: $log is used as an example here and in the following items. You can use another iterator name in the foreach loop if desired.
- $log – A temporary variable used to iterate through the items in $ownerLog; must be accessed through a ‘foreach’ loop in conjunction with the $ownerLog context key
Add Template to Workgroup
After creating a template in a Text Editor, the template can be added to the scheduler for use within a workgroup.
- On the Manage Templates Screen, hover the mouse over the green Actions Menu and select ‘Add Template’.

- On the Upload Template Screen, choose whether the template will be for recipients or job owners.
- Specify the file that you want to upload.

- Click the Upload Button.
Once a template is uploaded, it can be used in jobs existing at or below the workgroup level currently being managed. The template is also added to the appropriate workgroup in Files Manager. The folder is called ‘Scheduler Templates’.
Download and Update Existing Templates
This section describes how to download the email template and upload the new version through the Scheduler interface.
Download Email Template Through Scheduler
- After accessing the Manage Templates Screen, click the ‘Edit’ link.

- On the Edit Template Screen, click the ‘Download’ link in the View Column.

You can then open the file to edit it.
Upload New Version of Existing Template
After further customizing the template, the new version can be added through the Scheduler interface in the same way you added a new template. To replace the existing version of the template, be sure that the file has the same file name and be sure to choose the same Category (Recipient or Owner) as the email template you want to replace. When multiple versions of an email template exist in the Scheduler, the most recent file is used.
- On the Manage Templates Screen, hover the mouse over the green Actions Menu and select ‘Add Template’.
- On the Upload Template Screen, choose whether the template will be for recipients or job owners.
Note: The Category should match the category used for the previous version of the email template if the template already exists in the scheduler.
- Specify the file that you want to upload.
- Click the Upload Button.
The updated version of the template will now be used for job executions with recipients set to use the template.
Support Emails in Multiple Languages
The Edit Template Screen contains a table of all supported languages. From this screen you can download the latest version of a template, localize templates and give them labels in the languages they represent.
Change Template Label
The Template Label is what the Job Scheduler sees when specifying the email template that each recipient receives in the Recipient Settings Dialog.

- After accessing the Manage Templates Screen, click the ‘Edit’ link for the appropriate template.
- On the Edit Template Screen, click the text field in the Label Column and edit the label for each applicable language.
- Click the Save Button.
Localize Email Template
The Localized Column will display the name of the VM file for the language if one exists. To create localized versions of an email template, you must upload a vm file with its filename in the format X_Y.vm where X is the name of the default template and Y is the language code for that language (e.g. ownerTemplate_fr.vm). If you’re not sure what language code to use for a language, the Localized Column includes a tip button with additional information.
- After accessing the Manage Templates Screen, click the ‘Edit’ link for the appropriate template.
- To determine what the name of the file should be to localize it for a different language, click the tip icon for the appropriate language.

For example, clicking the Tip Icon for the French language will bring up the following dialog. 
- Rename the translated email template to match the filename indicated by the tip.
- Add the template for the workgroup.
After uploading the translated template, the Localized Column on the Edit Template Screen will display the name of the file.
- Now recipients set to receive the email template in that language will receive the translated email.
Delete Templates
Since email templates are stored in Files Manager, they can only be deleted through Files Manager by the Fountayn University.
Need more help?
 Please visit the Fountayn Contact Information page.